I once told you how much I love hopping from one link to another, then another, and another... I still do that a lot – old habits do die hard, I guess. :D
I needed to finish up a bag of shredded coconut – impulsive purchasing, anyone? – and my much beloved Food Blog Search got me here, then Memoria got me here... And Sheena’s recipe ended up in my oven.
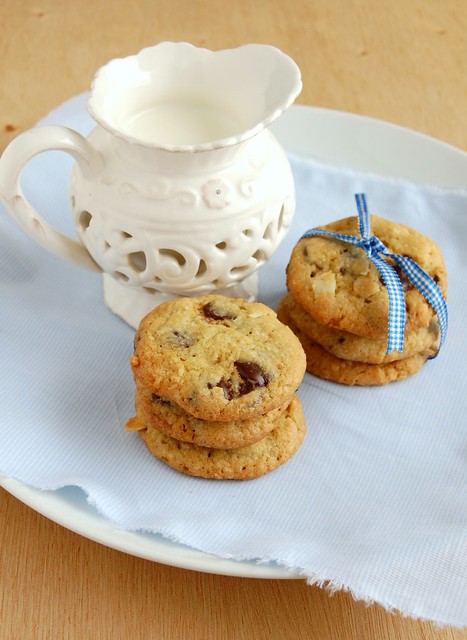
These cookies are delicious and were a hit at Joao’s work – I hope you give them a try!
Chocolate chip coconut cookies
½ cup (113g/1 stick) of unsalted butter, room temperature
¼ cup (50g) granulated sugar
¾ cup (131g) light brown sugar, packed
1 egg
1 teaspoon vanilla extract
1 ½ cups (210g) all purpose flour
¾ teaspoon baking soda
¼ teaspoon salt
1 ½ cups (150g) shredded sweetened coconut
225g (½ lb) dark chocolate chips/chunks
Preheat the oven to 180°C/350°F; line two large baking sheets with baking paper.
Cream the butter and the sugars until light and creamy, but not fluffy. Scrape down the sides of the bowl. Continue mixing while adding the egg - make sure it is incorporated. Add the vanilla. Scrape down the bowl with a spatula again. Combine the flour, soda and salt in another bowl. With a whisk, stir to combine. With the machine on low, slowly add the flour. Mix until just combined, taking care not to over mix. With a spatula fold in the chocolate and coconut.
Roll 1 slightly rounded tablespoon of dough into a ball, place onto prepared sheets 5cm (2in) apart, then slightly press each dough ball down with your hand.
Bake for 11-13 minutes or until lightly golden on the outside but still look gooey on the inside.
Makes about 45
Saturday, October 30, 2010
Chocolate chip coconut cookies
Thursday, October 28, 2010
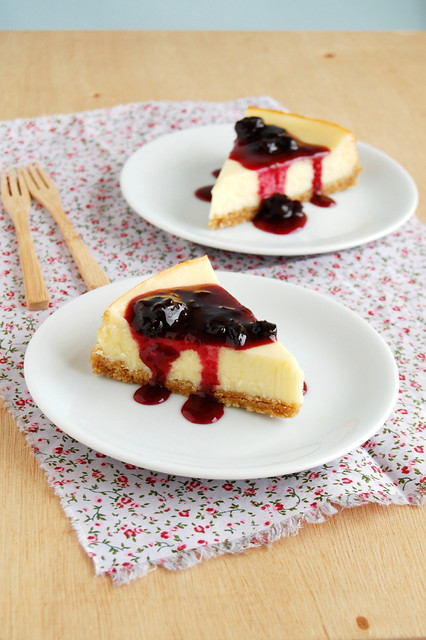
Vanilla cheesecake with blueberry lemon sauce
I told you I had an addiction – if you did not believe me then, you might start believing me now. :D
There is one thing different, however: this time I went for blueberries instead of blackberries, as in Natalie’s recipe. Just don’t ask me which one I like more – you know I have trouble picking favorites. :D
Vanilla cheesecake with blueberry lemon sauce
from Donna Hay magazine and here
Base:
125g digestive/shortbread cookies – I used these, Ana’s suggestion
½ cup (50g) almond meal (ground almonds)
3 tablespoons (42g) unsalted butter, melted
Cheesecake:
370g ricotta
370g cream cheese
1 1/3 cups (267g) caster sugar
3 eggs
2 teaspoons vanilla extract
Blueberry lemon syrup:
1 cup blueberries, fresh or frozen
¾ cup (150g) caster sugar
1 tablespoon lemon zest
3 tablespoons lemon juice
¼ cup (60ml) water
1 tablespoon corn starch
Preheat the oven to 140°C/285°F.
Make the base: process cookies in a food processor until crushed. Add the almond meal and butter and process until combined. Grease a round 22cm springform pan*. Press the crumb mix over the base and refrigerate.
Place the ricotta and cream cheese in a food processor and process until smooth. Add the sugar, eggs and vanilla and process until combined and smooth. Pour the mixture over the base and bake for 55-60 minutes or until set.
In the meantime, make the sauce: combine the blueberries, sugar, lemon zest and juice in a non-reactive saucepan. Whisk together the water and cornstarch in a small bowl and add to the saucepan. Turn the heat on to medium and let simmer until thickened, about 10 – 12 minutes – while the mixture is simmering, squash the berries with a fork. Let cool completely.
Remove the cheesecake from the oven and allow to cool in the pan. Serve with the sauce.
* I made 2/3 of the recipe above (for the base and cheesecake) and used a loose-bottomed 20cm (8in) round cake pan
Serves 8-10
Tuesday, October 26, 2010
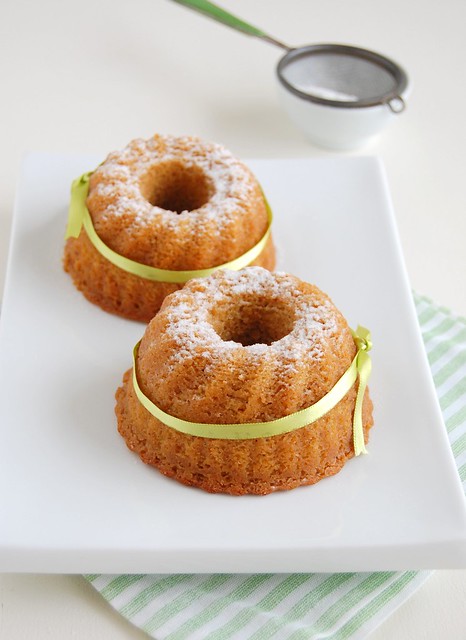
Honey and gingerbread cakes
A couple of days ago I was talking here about how the holiday season brings me down - I saw panettones at the supermarket and realized that Christmas is just around the corner. On the other hand, I love holiday food – I’ve been planning a special series of holiday posts, like the one I did last year, but luckily with more recipes this time.
It’s too soon to start the holiday series around here, I know, but I could not resist making these cakes – they’re on the DH mag I received last Friday.
Honey and gingerbread cakes
from Donna Hay magazine
¼ cup honey
¼ cup corn syrup
½ cup brown sugar, packed
¾ cup whole milk
¾ cup (105g) all purpose flour
1 ¼ teaspoons baking powder
1 teaspoon ground ginger
¼ teaspoon ground cinnamon
1/8 teaspoon ground cloves
1/8 teaspoon ground allspice
pinch of freshly ground nutmeg
65g unsalted butter, cold and chopped
1 egg
icing sugar, to serve
Preheat the oven to 180°C; butter twelve 1/3 cup (80ml) capacity mini bundt pans*.
Place the honey, corn syrup, sugar and milk in a small saucepan over medium heat and stir until the sugar is dissolved. Set aside to cool until lukewarm.
Place the flour, baking powder, ginger, cinnamon, cloves, allspice, nutmeg and butter in a food processor and process until the mixture resembles fine breadcrumbs. While the motor is running, gradually add the honey mixture and process until smooth. Add the egg and process for 1 minute. Spoon the mixture into the prepared pans and bake for 20-25 minutes or until risen and golden and a skewer inserted in the center of the cakes comes out clean. Cool the cakes in the pan for 10 minutes then carefully unmold. Cool completely on a wire rack. Dust with icing sugar to serve.
* I made the exact recipe and used four 1 cup (240ml) capacity bundt pans
Makes 12
Sunday, October 24, 2010
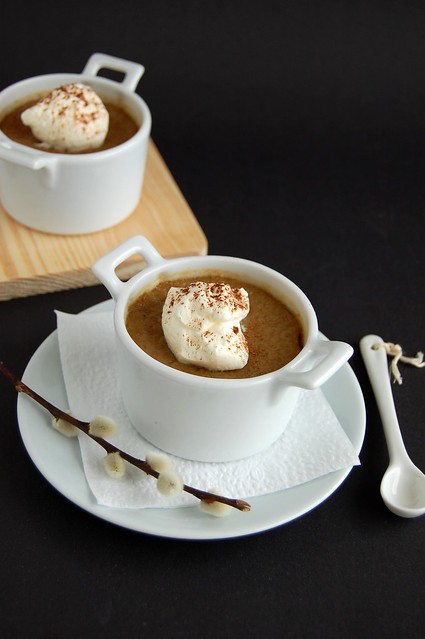
Butterscotch pots
You almost got another panna cotta here today. :)
I think of panna cotta every time I need to use up heavy cream before it goes bad – what changed my mind this time, you might ask? The poor lonely egg yolks left from the buttercream on my MIL’s birthday cake. :D
These pots are delicious but also very, very rich – small cups are the way to go here.
Butterscotch pots
from Sticky, Chewy, Messy, Gooey
6 tablespoons (84g) unsalted butter
1 ½ cups (262g) dark brown sugar, packed
3 ½ cups (840ml) heavy cream
¾ teaspoon salt
1 tablespoon vanilla extract
1 tablespoon Scotch whisky or Irish whiskey
9 large egg yolks
sweetened whipped cream, to serve (optional)
Preheat the oven to 325°F/160°C.
In a large, heavy-bottomed saucepan, combine the butter and brown sugar and melt together over medium heat and bring to a boil. Boil for 1 minute and then stir in ½ cup of the cream. Stir until the mixture is smooth and combined. Remove from the heat and stir in the remaining 3 cups of cream, the salt, vanilla and whiskey.
In a large bowl, whisk the egg yolks until smooth. Gradually whisk in the cream until smooth – whisk continuously to avoid cooking the yolks. Strain the custard through a fine sieve into a large container with a pouring spout. Divide the custard among 8 ovenproof ramekins/cups.
Place the ramekins in a large roasting pan. Place the roasting pan in the oven and pour boiling water into the pan until it reaches halfway up the sides of the ramekins. Cover the roasting pan with foil and pierce it in several places to allow steam to escape.
Bake the custards just until set around the edges and still slightly wobbly in the center, 45-60 minutes. Remove the custards from the oven and then from the water bath; set aside to cool completely then refrigerate, covered with plastic wrap, until well chilled, at least 4 hours for up to overnight. Top the custards with a dollop of whipped cream, if desired, and serve (I dusted the cream with a little cocoa powder).
Serves 8 - I made 1/3 of the recipe above and used 200ml capacity cups
Friday, October 22, 2010
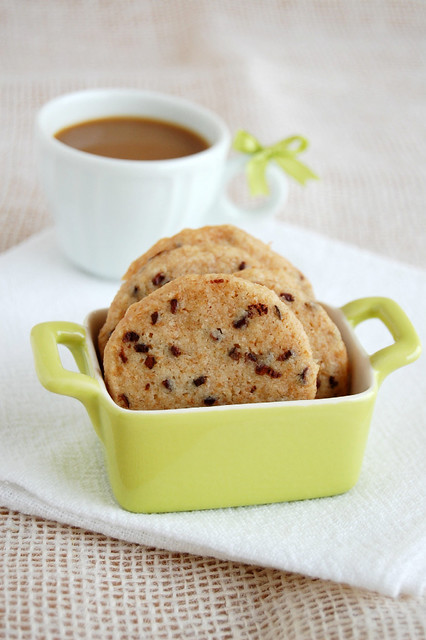
Nibby whole wheat sablés
I’ve been having lots of fun with this beautiful book lately – Anh, Ana Elisa and I will probably start a fan club for Alice Medrich any day now. :D
Besides being a terrific baker, Ms. Medrich has a great sense of humor: it’s written on her recipe that these (delicious) cookies can be stored for 1 month – like they are going to last that long. :D
Nibby whole wheat sablés
from Pure Dessert
1 cup (140g) all purpose flour
scant 1 cup (112g) whole wheat flour
1 cup (2 sticks/226g) unsalted butter, softened
½ cup (200g) caster sugar
¼ teaspoon salt
1 teaspoon vanilla extract
¼ cup cacao nibs
Whisk the all purpose and whole wheat flours together in a medium bowl. Set aside.
In the large bowl of an electric mixer, beat the butter with the sugar, salt and vanilla for about 1 minute, until smooth and creamy but not fluffy. Mix in the cacao nibs. Add the flours and mix just until incorporated. Scrape the dough into a mass and, if necessary, knead with your hands a few times, just until smooth.
Divide the dough in half and shape each half into a log – each should be 5cm (2in) in diameter. Wrap in baking paper – look how Martha does it here – and refrigerate for at least 2 hours or, preferably, overnight.
Preheat the oven to 180°C/350°F; line two large baking sheets with baking paper. Use a sharp knife to cut the logs of dough into 6mm (¼ in) slices. Place the cookies on the prepared sheets 1.25cm (½ in) apart. Bake until the cookies are light golden brown at the edges, 12-14 minutes, rotating the baking sheets halfway through the baking. Let the cookies firm up on the pans for about 1 minute, then carefully transfer them to a wire rack using a wide metal spatula.
Cookies can be stored in an airtight container for up to 1 month.
Makes 48 – I halved the recipe above and got 23 cookies
Wednesday, October 20, 2010
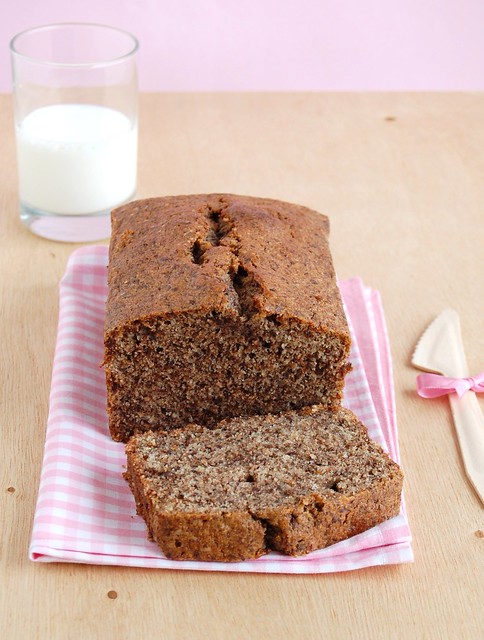
Wheat and chocolate pound cake
Doesn’t this cake look good? It tasted great, too, I can assure you. :) But the funny thing about this recipe is that preparing it made me think of my grandma – and no, she doesn’t like chocolate. It’s just that I was not in the mood for extra washing up and decided to grate the chocolate with a box grater, instead of grabbing the food processor. What a bad decision it was: it took me FOREVER to do it and by the end of it I had no strength left in my poor arm. :S
That’s why I thought of grandma: I grew up with her saying that “being lazy is a sin”... :D
Wheat and chocolate pound cake
from Pure Dessert
3 tablespoons whole milk, room temperature
3 large eggs, room temperature
1 ½ teaspoons vanilla extract
1 cup (100g/3 ½oz) sifted (before measuring) cake flour*
1/3 cup + 1 tablespoon (56g) whole wheat flour
¾ cup (150g) caster sugar
¾ teaspoon baking powder
¼ teaspoon salt
13 tablespoons (182g) unsalted butter, softened
100g (3 ½oz) dark chocolate
Grate the chocolate on the large holes of a box grater, the large grating disk of food processor, or pulse, using the steel blade, in the processor. Set aside.
Preheat the oven to 180°C/350°F; butter a 20x10cm (8x4in - 4-5 cups capacity) loaf pan, line with baking paper and butter the paper as well.
In a medium bowl, whisk the milk, eggs and vanilla.
Mix together and then sift the flours, sugar, baking powder and salt into the large bowl of an electric mixer – if any bran is left in the sifter pour it back to the bowl. Cut the butter into chunks and add it, then pour in half the egg mixture. Beat on low speed just until the dry ingredients are moistened. Increase the speed to medium (or high if using a hand held mixer) and beat for 1 minute only. Scrape the sides of the bowl. Add half of the remaining egg mixture and beat for 20 seconds. Scrape the bowl. Add the rest of the egg mixture and the chocolate and beat for 20 seconds. Scrape the batter into the prepared pan and smooth the surface. Bake until a wooden skewer inserted in the center comes out clean, 55-65 minutes (to prevent excessive browning, tent the cake with foil after 30 minutes, if necessary). Cool the cake in the pan for about 10 minutes on a rack, then remove and cool completely on the rack.
* homemade cake flour: 1 cup (140g) all purpose flour minus 2 tablespoons + 2 tablespoons corn starch
Serves 8-10
Monday, October 18, 2010
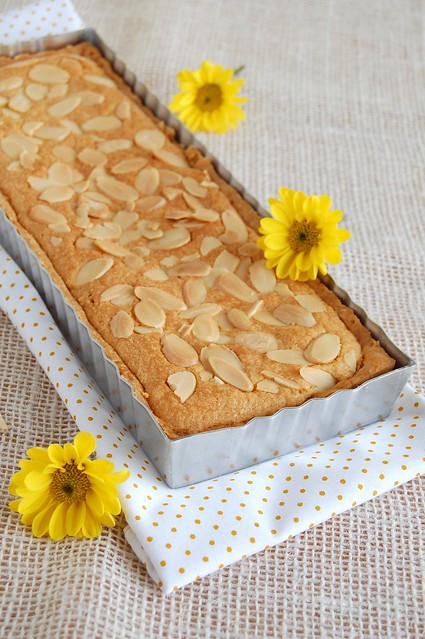
Lemon frangipane tart
There’ someone you all know that is so obsessed with lemons that when she’s not making lemon cookies or lemon cakes there’s a lemon tart coming out of her oven. :D
Maybe because I am crazy for lemons I did not think this tart was lemony enough, but a friend of mine loved it and felt the lemon flavor even though I did not tell her there was any in the dessert. Now it’s up to you: if you’re like me, add a little lemon zest in the filling as well. ;)
Lemon frangipane tart
from Donna Hay magazine
Pastry:
1 ½ cups + 1 ½ tablespoons (225g) all purpose flour
½ cup + 1 tablespoon (127g) unsalted butter, chilled and cut into cubes
½ cup + 1 tablespoon (78g) icing sugar
pinch of salt
1 teaspoon finely grated lemon zest
3 egg yolks
1 tablespoon iced water
Filling:
100g unsalted butter, softened
½ cup + 1 tablespoon (112g) caster sugar
1 egg
1 egg yolk
1 ¼ cups (125g) almond meal (finely ground almonds)
¼ cup (35g) all purpose flour
¼ cup flaked almonds
Place the flour, butter, sugar, salt and zest in the bowl of a food processor. Process in short bursts until mixture resembles fine breadcrumbs.
While the motor is running, add the egg yolks and water. Process just until the dough comes together. Turn dough into a lightly floured surface and gently bring together to form a ball. Using your hands, flatten into a disk, wrap in plastic wrap and refrigerate for 1 hour.
Roll dough between two sheets of lightly floured baking paper – if dough gets too soft, refrigerate for 5 minutes. Line a lightly buttered 22cm loose-bottomed tart pan with the pastry. Trim edges with a knife and prick the base with a fork. Freeze for 30 minutes.
Preheat the oven to 180°C/350°F. Line the pastry with a piece of buttered foil and fill with baking weights/dried beans. Bake for 15 minutes, carefully remove the weights/beans and the foil, then bake for another 10 minutes or until the pastry is light golden.
Make the filling: place the butter and sugar in the bowl of an electric mixer and beat until light and creamy. Gradually add the egg and egg yolk and beat until smooth. Stir through the almond meal and flour until well combined. Spoon mixture into pastry case and smooth the top. Sprinkle with the almonds and bake for 30-35 minutes or until the filling has puffed and turned golden. Allow to cool in the pan.
Serves 6-8 – I made 2/3 of the recipe above and used a 30x10cm (12x4in) pan
Friday, October 15, 2010
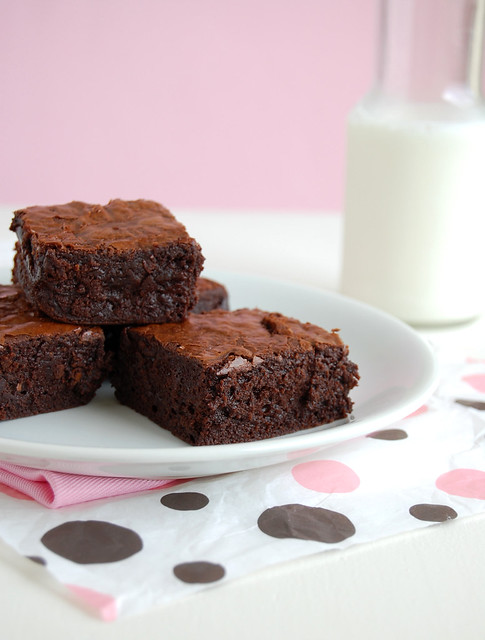
Tartine’s brownies
I made these for my official brownie tester and asked her opinion about them: she said they were really, really, good and eating them was like “biting into foam”. Then I asked if these were better than her favorite brownies – she said she couldn’t decide, because they were both delicious, despite being different in texture.
I guess that lack of decision making mojo runs in the family – I can’t pick a favorite between Bill and Eric... ;)
Recipe from this book, but I was too lazy to type it and stole it from Mark’s blog. :D
Tartine’s brownies
from Tartine
¾ cup (170g) unsalted butter
455g (1 pound) bittersweet chocolate, coarsely chopped – I used 70% cocoa solids
5 large eggs
2 cups (350g) light brown sugar, packed*
½ teaspoon salt
1 teaspoon vanilla extract
1 cup + 2 tablespoons (125g) all purpose flour
Preheat the oven to 180°C/350°F. Butter a 23x33cm (9x13in) glass baking dish with foil and butter the foil as well.
In a small saucepan or a microwaveable bowl, melt the butter over low heat. Remove from the heat/microwave and stir in the chocolate. If it's not fully melted, return over low heat for 10 seconds or microwave on low power for 15 second-intervals, stirring in between, until it is melted. Cool completely.
In the large bowl of an electric mixer, combine the eggs, sugar, salt, and vanilla. Beat on high speed for about 4-5 minutes, after which the batter will fall from the whisk in thick ribbons that slowly sinks into the surface. Fold the chocolate into the eggs with a rubber spatula. Sift the flour over the surface and fold in gently. Pour into the dish and smooth the top. Bake for 25 minutes (the top will slightly crack-- a cake tester won't be accurate for this one).
Let cool completely before cutting.
* I used 140g brown sugar + 125g demerara sugar
Makes 12 – I made 2/3 of the recipe above and used a square 20cm (8in) pan
Wednesday, October 13, 2010
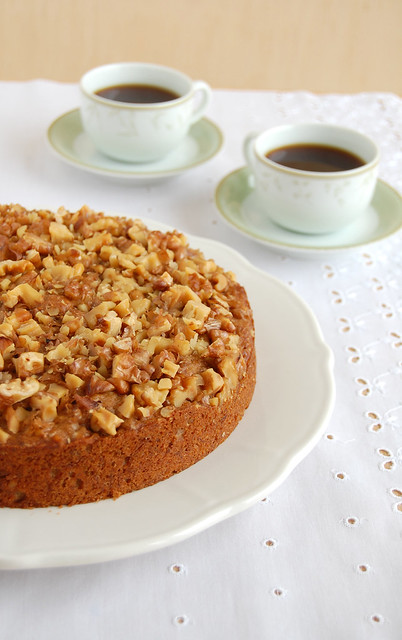
Banana walnut cake (with quinoa flour)
As I previously told you, I’ve been having fun baking with different kinds of flour – and there’s a lot to come, I guarantee. :D
As for this cake, it is really good – my sister loved it – but hasn’t dethroned my favorite banana cake. I found the walnuts a bit bitter after being toasted twice – I’m using sliced almonds next time I make this recipe.
Banana walnut cake
from Good to the Grain
2 cups (210g) walnut pieces
½ cup (60g) quinoa flour
1 cup (140g) all purpose flour
1 tablespoon baking powder
½ teaspoon salt
½ cup (113g/1 stick) cold unsalted butter, chopped into 1.25cm (½in) pieces
½ cup (88g) dark brown sugar, packed
½ cup (100g) granulated sugar
3 ripe bananas, whole
2 eggs
1/3 cup (87g) sour cream – I used plain yogurt
1 teaspoon vanilla extract
Position a rack in the middle of the oven and preheat to 180°C/350°F. Butter a 23cm (9in) round cake pan.
Measure the walnuts onto a baking sheet and toast in the oven until light golden-brown and fragrant, about 15 minutes. Set aside to cool completely.
Sift the dry ingredients into a large bowl, pouring back into the bowl any bits of grain or other ingredient that may remain in the sifter. Set aside. Grind 1 cup of the toasted walnuts in a food processor, about 15 seconds. With a sharp knife, finely chop the remaining cup of walnuts and reserve – the chopped nuts will be added later as a topping.
Add the butter and sugars to the bowl of an electric mixer with the paddle attachment. Mix on medium-high speed until light and creamy, about 3 minutes. Using a spatula, scrape down the sides of the bowl. Add the bananas and mix on medium for 30 seconds or until the bananas are broken down. Add the eggs, one at a time, mixing on medium speed until thoroughly combined. Add the sour cream and vanilla and mix until combined. Again, scrape the sides of the bowl.
Add the ground walnuts and the dry ingredients and mix on low speed just until combined; remove the bowl from the mixer and finish mixing using a spatula, until smooth.
Scrape the batter into the prepared pan and smooth the top. Sprinkle with the reserved walnuts and bake for 50-60 minutes or until the cake is golden brown and a skewer inserted in the center comes out clean. Cool in the pan.
Wrapped in plastic, the cake can be kept for up to 3 days.
Serves 8 – I made 2/3 of the recipe above and used a round 20cm (8in) cake pan
Monday, October 11, 2010
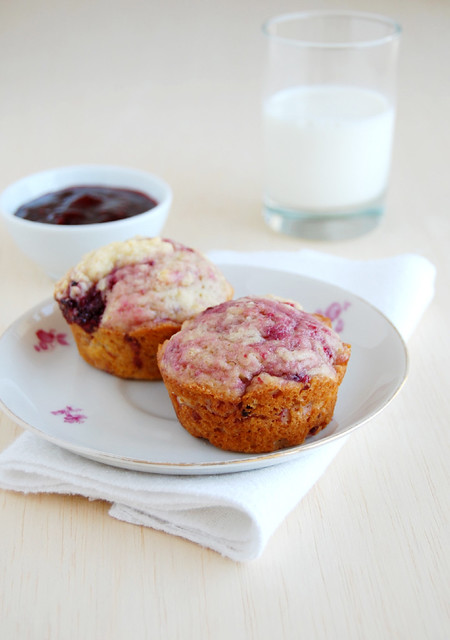
Jam swirled muffins
There’s something you need to know: I’m addicted to the blackberry lemon jam used in this ice cream recipe – I’ve eaten it with crackers, poured over panna cotta... I just can’t get enough of it.
I thought the jam would go wonderfully mixed in muffin batter – I don’t mean to sound pretentious, but I was right. :D
Jam swirled muffins
adapted from Dorie's lemon poppy seed muffins
2/3 cup (133g) caster sugar
2 cups (280g) all purpose flour
2 teaspoons baking powder
¼ teaspoon baking soda
¼ teaspoon salt
¾ cup plain yogurt or sour cream
2 large eggs
2 teaspoons vanilla extract
½ cup (113g/1 stick) unsalted butter, melted and cooled
2/3 cup jam of your choice – if too thick, thin it with a little lemon juice (I used this recipe)
Preheat the oven to 200°C/400°F; butter or spray 12 regular size muffin pans.
In a large bowl, sift the flour, baking powder, baking soda and salt. Add sugar and mix. In a large glass measuring cup or small bowl whisk together the yogurt, eggs, vanilla and melted butter until well blended. Pour the liquid ingredients over the dry ingredients and whisk lightly with a fork – do not overmix the batter, otherwise you’ll end up with tough muffins. Add the jam and whisk lightly, to keep the marbled effect. Divide the batter evenly among the prepared pans.
Bake for 18-20 minutes or until the tops are golden and a skewer inserted in the center of the muffins comes out clean. Transfer to a wire rack, cool 5 minutes, then carefully unmold. Let cool completely on the wire rack.
Makes 12 – I halved the recipe, used 1/3 cup (80ml) capacity pans and got 8 muffins
Saturday, October 9, 2010
Chocolate-chunk oatmeal cookies with pecans and cranberries
Just so you know it, these cookies – from Tara’s gorgeous blog – are delicious. And if you do not believe me, here’s the dialogue I had with one of my friends from work (the ones I shared the cookies with):
- You know, L., oats are really good for you, good for your heart.
- Well, those cookies were so delicious I would have eaten them even if they were bad for me.
I rest my case. ;)
Chocolate-chunk oatmeal cookies with pecans and cranberries
1 ¼ cups (175g) unbleached all-purpose flour
¾ teaspoon baking powder
½ teaspoon baking soda
½ teaspoon salt
1 ¼ cups (144g) old-fashioned rolled oats
1 cup (110g) pecans, toasted and chopped
1 cup (110g) dried cranberries
112g (4oz) bittersweet chocolate, chopped into small pieces about the size of chocolate chips
¾ cup (170g/1 ½ sticks) unsalted butter, softened but still cool
1 ½ cups (262g) packed dark brown sugar
1 large egg
1 teaspoon vanilla extract
Preheat oven to 180°C/350°F; line two large baking sheets with baking paper.
In a bowl, sift together the flour, baking powder, baking soda and salt. Set aside.
In another bowl combine the oats, pecans, dried cranberries and chocolate.
In the bowl of a stand mixer with the paddle attachment, or with a hand mixer, cream together the butter and sugar on medium speed until light and fluffy, scraping down the sides of the bowl as needed. With the mixer on medium-low, add the egg and beat until incorporated.
Scrape down the sides of the bowl, turn the mixer down to low, and add the flour mixture to the bowl. Stir until just combined. Finally incorporate the oats, nuts, fruit and chocolate. Do not overmix. Turn off the mixer and use a rubber spatula to give the dough a final stir and make sure that all the ingredients are incorporated.
Using an ice cream scoop to measure ¼ cup portions of dough. Roll these portions lightly between your hands, then place 8 on each baking sheet, spaced evenly. Wet your hands and lightly press the dough to a 2.5cm (1in) thickness. Bake the cookies, one tray at a time, for 12 minutes. Rotate the tray and bake for another 8 minutes or until the cookies are uniformly golden, but still wet in the middle. You might think that they're undercooked, but you're wrong - resist the urge to overbake, they will set up further as they cool.
Remove from the oven and cool on the baking sheets for 5 minutes before transferring to a wire rack. Store cooled cookies in an airtight container at room temperature.
Makes 16 – I halved the recipe above, used 1 slightly rounded tablespoon of dough per cookie and got 32
Thursday, October 7, 2010
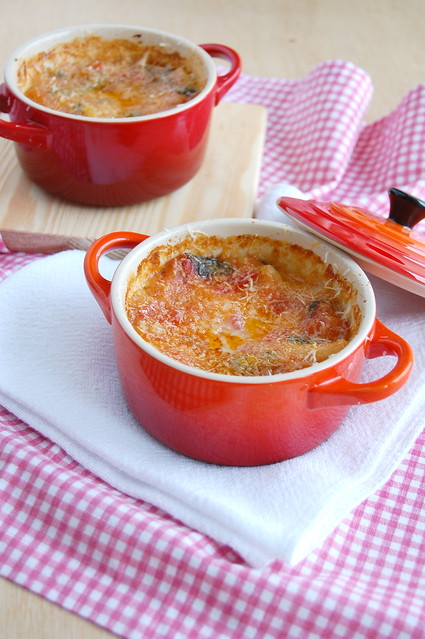
Mini lasagna + great people
I might be a little disappointed with Twitter, but on the other hand I’m surrounded by wonderful people – and that feels great.
Not many of you know, but I work as an executive assistant and September, 30 is considered our day; the beautiful cocottes you see on the photo were a gift from one of my bosses – the one who also gave me the blowtorch for Christmas; needless to say, I was completely speechless after opening the gift wrap – I wasn’t expecting such thoughtful, beautiful gift.
And speaking of wonderful people, every time I post something savory around here I think of my dear friend Ivan – I’m just not sure he likes lasagna. :D
Mini lasagna
There’s no actual recipe for this: it’s just a matter of layering pasta, tomato sauce – Bolognese, if you prefer – and cheese; you can find great step-by-step photos on Tati’s blog – that is where I got the idea for this dish.
Tuesday, October 5, 2010
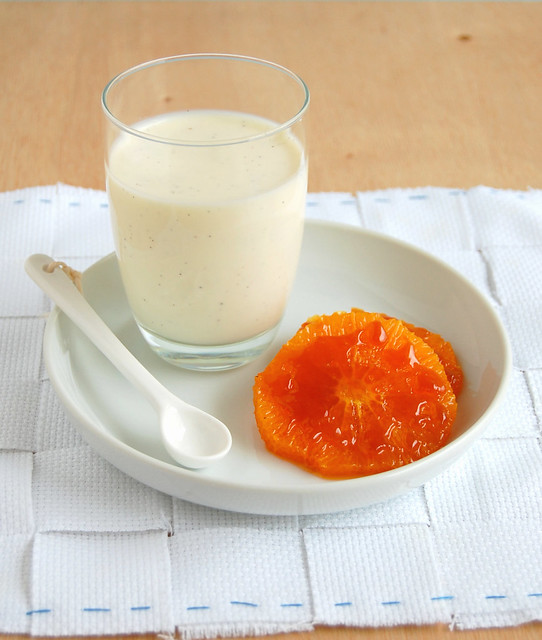
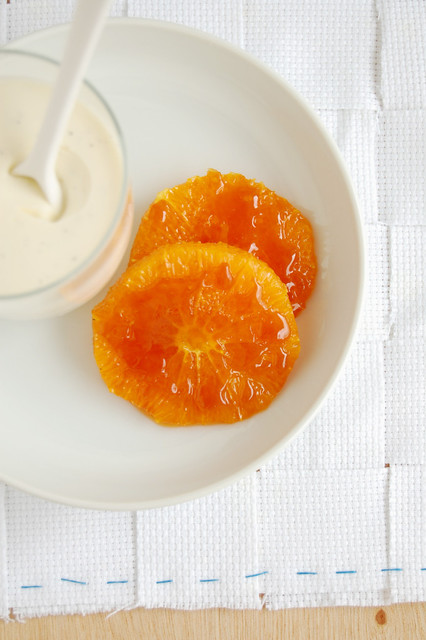
Yogurt panna cotta with caramelized tangerine slices
A while ago I told you how much I was enjoying Twitter, but something changed some days ago – I haven’t felt that way anymore. It is probably my fault – I should follow other people, people I might have more in common with. :S
I think I need something sweet – I’ll go have another panna cotta. :D
Yogurt panna cotta with caramelized tangerine slices
from here and from Australian Gourmet Traveller
Panna cotta:
¾ cup (180ml) heavy cream
½ vanilla bean, split lengthwise and seeds scraped with the back of a knife
¼ cup + ½ tablespoon (56g) caster sugar
2 leaves gelatin
250g skim milk yogurt – I used regular yogurt
Caramelized tangerine slices:
¼ cup (50g) caster sugar
1 ½ tablespoons water
½ teaspoon unsalted butter
1 teaspoon orange-blossom water
vegetable oil, for greasing
2 tangerines, thickly sliced horizontally
Heat the cream in a small saucepan over medium heat just until it comes to a boil. Add the vanilla seeds and bean, stir, cover and let infuse for 30 minutes.
Add the sugar to the cream and reheat, stirring to dissolve the sugar, again just until it boils. Remove from the heat.
Soak the gelatin in a bowl of cold water until soft. Squeeze out the excess water and drop the gelatin into the hot cream mixture and whisk until dissolved. Add the yogurt and whisk until smooth.
Strain the mixture through a fine sieve, discard the vanilla bean, then divide between four ½-cup capacity (120ml) ramekins. Set aside to cool, cover with plastic wrap and chill for at least 3 hours, or until just set.
Make the tangerine slices: combine sugar and water in a small saucepan over medium heat, stir to dissolve sugar, then cook until dark caramel (4-5 minutes). Remove from heat, add butter and orange-blossom water (be careful as hot toffee may spit), then return to heat and stir until dissolved. Pour onto an oiled metal tray and set aside to cool. When cool, break into coarse pieces and process in a food processor until finely ground. Place mandarin slices on a baking tray, scatter with orange-blossom toffee, then caramelize with a blowtorch (or under a hot grill) until golden (2-3 minutes). Serve immediately with the panna cotta.
Serves 4 - this panna cotta is also delicious served with this blackberry lemon swirl
Sunday, October 3, 2010
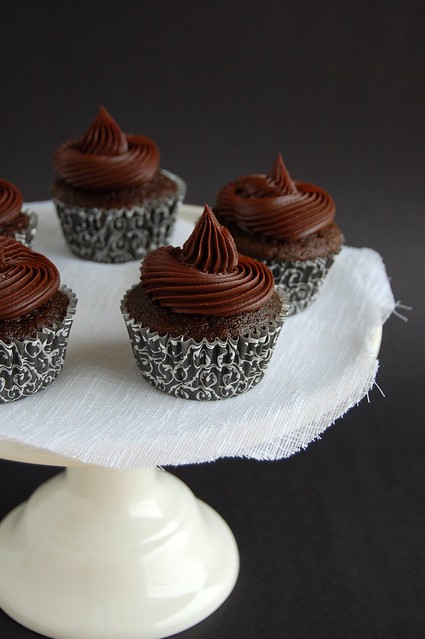
Ana's chocolate cupcakes
Besides the piña colada cake, I made these cupcakes for my MIL’s birthday – chocolate is THE universal favorite flavor and I thought that they would look pretty on the table. :D
The recipe comes from my dear friend Ana Elisa and you won’t believe how easy and quick it is.
Speaking of Ana – the newest and loveliest mom-to-be in the food blog community – she’s getting a little bit older today... Happy birthday, Ana Elisa! ♥
Ana's chocolate cupcakes
Cakes:
1 cup + 2 tablespoons (170g) all purpose flour
¼ cup (22g) cocoa powder
1 ¼ teaspoon baking soda
¼ teaspoon salt
1 large egg
½ cup (88g) brown sugar, packed
½ cup (100g) granulated sugar
½ cup (120ml) + 2 tablespoons whole milk
1/3 cup (80ml) strong brewed coffee or espresso
½ cup (113g) unsalted butter, melted and cooled
Ganache:
170g dark chocolate (I used 70% cocoa solids), finely chopped
¾ cup (180ml) heavy cream
3 tablespoons (42g) unsalted butter, room temperature
Start by making the cakes: preheat the oven to 180°C/350°F; line a 12-hole muffin pan with paper cases (the paper cases will make unmolding infinitely easier since these cakes are very tender and fragile).
Sift the flour, cocoa powder, baking soda and salt in a medium bowl. Set aside.
In another bowl, whisk the egg and sugars until smooth. Add the milk, coffee and butter and whisk to combine. Pour over the sifted ingredients and mix only until smooth.
Pour the batter into the prepared pans until ¾ full. Bake for 15 minutes or until a skewer inserted in the center of the cake comes out clean. The cakes won’t rise much and will have flat tops, making the icing process easier*.
Let cool in the pan for 10 minutes, then carefully unmold and place on a wire rack to cool completely.
In the meantime, make the ganache: melt the chocolate in a bowl placed over a pan of simmering water until smooth. Remove from heat. Warm the heavy cream in medium heat until it just starts to boil. Pour over the chocolate and whisk until smooth. Set aside until warm, add the butter and whisk well to combine. Set aside until firm enough to spread over the cupcakes (1 hour room temperature or 20-30 minutes in the fridge)
Spread the ganache over the cakes. The cupcakes are best eaten on the same day they are made but will keep in an airtight container in the fridge – the icing will firm up a bit but will still taste great (and it will prevent the cake from drying out).
* I’ve made these cupcakes twice and in one of those times I halved the recipe; I filled the pans a bit less than ¾ full and the cupcakes had nice, tall domes – half the recipe yielded 7 cupcakes (I used 1/3 cup capacity pans)
Makes 12
Friday, October 1, 2010
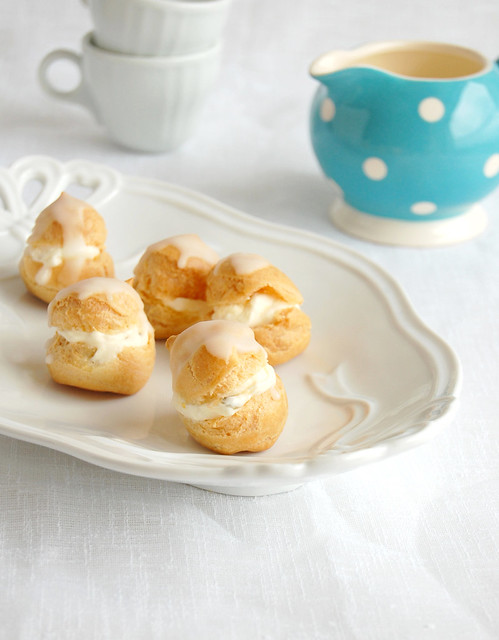
Passion fruit cream profiteroles
I’ve been feeling very brave these past few days: I managed to watch “Damien: Omen II” entirely, without looking away not even for a second, AT NIGHT. :)
Now I’m ready to watch the last part and complete the trilogy – but this lovely lady and I have come to the conclusion that I’m going to need something to stay calm throughout the movie, like passion fruit juice. I wonder if passion fruit profiteroles would do the trick... :)
Passion fruit cream profiteroles
adapted from Donna Hay magazine
Profiteroles:
1 cup (240ml) water
100g unsalted butter
¾ cup + 1 tablespoon (115g) all purpose flour
5 eggs
Passion fruit cream:
1 ¼ cups (300ml) heavy cream, whipped to firm peaks
½ cup fresh passion fruit pulp (still with the seeds)
¼ cup (35g) icing sugar, sifted
Lemon icing:
1 ½ cups (210g) icing sugar, sifted
2-3 tablespoons lemon juice
Preheat the oven to 200°C/400°F; line two large baking sheets with baking paper.
Place water and butter in a saucepan over high heat and bring to the boil. Add the flour and beat with a wooden spoon until smooth. Cook, stirring, over low heat until the mixture leaves the sides of the pan. Remove from the heat and transfer to the large bowl of an electric mixer. Beat on high speed, gradually adding the eggs until well combined – whisk the eggs lightly with a fork before adding them to the batter and pour in gradually; you might not need all the egg mixture.
Spoon the mixture into a piping back with a 12mm plain nozzle and pipe 2cm rounds onto prepared baking sheets. Bake for 20-25 minutes or until puffed and deep golden. Cool on wire racks, then carefully remove profiteroles from baking paper.
Make the filling: place cream, passion fruit and sugar in a bowl and stir gently to combine. Set aside. Make the icing: mix icing sugar and lemon juice in a bowl until smooth. Fill the profiteroles with the passion fruit cream and spoon over the lemon icing.
Makes 45 – I halved the recipe above and got 35 fairly small profiteroles
