Wednesday, June 30, 2010

Strawberry crumble bars

Strawberry crumble bars / Barrinhas de morango com cobertura de crumble

One of the movies I’ve watched a dozen times and will watch again every time it’s on TV is “Under the Tuscan Sun” – can’t get enough of all those beautiful locations! And Diane Lane is absolutely gorgeous – I think Joao has a crush on her, but I don’t mind. :)

Last week I received the latest issue of my favorite magazine and there it was: a recipe for beautiful rhubarb crumble bars – because of my current rhubarb/strawberry obsession I considered it a sign - and much better than the one Francesca received in Bramasole. :)

Strawberry crumble bars
adapted from Donna Hay magazine

Base:
1/3 cup + 1 tablespoon (78g) caster sugar
1 ½ cups + 2 ½ tablespoons (225g) all purpose flour, sifted
½ teaspoon baking powder, sifted
pinch of salt
1 egg, lightly beaten
100g unsalted butter, melted

Strawberry filling:
450g strawberries, hulled and chopped*
½ cup + 1 tablespoon (112g) caster sugar
1 teaspoon vanilla extract

Crumble topping:
1 ½ cups + 2 ½ tablespoons (225g) all purpose flour, sifted
1/3 cup + 1 tablespoon (78g) caster sugar
150g cold unsalted butter, chopped

Preheat the oven to 180°C/350°F. Butter a 20x30cm (8x12in) baking pan and line with foil, leaving an overhang on two opposite sides. Butter the foil.
Place the sugar, flour, baking powder, salt, egg and butter in a bowl and mix to combine. Press into the base of the prepared pan and bake for 20-25 minutes or until golden and firm. Let cool completely.
While the base is baking, make the filling: place the strawberries, sugar and vanilla in a bowl and toss to combine. Set aside.
Make the topping: place the flour and sugar in a bowl and mix to combine. Add the butter and use your fingertips to rub it into the flour mixture until it resembles coarse breadcrumbs. Using a slotted spoon and shaking off any excess juice, distribute the strawberries over the base**. Top with the crumble topping and bake for 35-40 minutes or until golden.

* or use 500g rhubarb, chopped, instead

** don’t throw the juices away – pour them over some yogurt, yum!

Makes 16 – I made 2/3 of the recipe above and used a 20cm (8in) square pan

Monday, June 28, 2010

Pear croustade with lemon pastry and almonds

Pear croustade with lemon pastry and almonds / Croustade de pêra com massa de limão siciliano e amêndoas

After I finished making these tarts – and took a bite out of one – I immediately thought that this would be a great recipe for those of you who are beginning to bake: no equipment required – just a bowl and a fork to make the pastry – and no specific baking pan either. And there’s another good aspect for my Brazilian readers: since pears are in season, this is a delicious and budget-friendly dessert. :)

Pear croustade with lemon pastry and almonds / Croustade de pêra com massa de limão siciliano e amêndoas

Pear croustade with lemon pastry and almonds
from here

Pastry:
1 ½ cups (210g) all purpose flour
2 tablespoons sugar
1 teaspoon finely grated lemon zest
½ teaspoon salt
½ cup (113g/1 stick) chilled unsalted butter, cut crosswise into ¼-inch slices
¼ cup (or more) whipping cream

Filling:
450g (1 pound) firm but ripe Bartlett pears, peeled, cored, thinly sliced
450g (1 pound) firm but ripe Bosc pears, peeled, cored, thinly sliced
5 tablespoons sugar
1 tablespoon + 2 teaspoons all purpose flour
2 tablespoons lemon juice
1 teaspoon finely grated lemon zest
¼ teaspoon (generous) ground nutmeg
whipping cream (for brushing)
2 tablespoons sliced almonds

For pastry: whisk flour, sugar, lemon zest, and salt in medium bowl. Add butter; using fingertips, rub in butter until coarse meal forms. Drizzle ¼ cup cream over; toss with fork until moist clumps form, adding more cream by teaspoonfuls as needed if dry. Gather dough into ball; flatten into disk. Wrap in plastic and chill 1 hour (can be made 1 day ahead. Keep chilled. Let stand at room temperature 30 minutes before rolling out).

For filling: preheat the oven to 200°C/400°F. Mix all pears, sugar, flour, lemon juice, lemon zest, and nutmeg in large bowl to coat. Roll out pastry on sheet of floured parchment paper to 35cm (14in) round. Transfer crust on parchment paper to baking sheet. Mound pears in center of pastry, leaving 5cm (2in) plain border. Fold pastry border over pears, crimping slightly. Brush pastry edges with cream; sprinkle with sliced almonds.
Bake croustade until filling bubbles and almonds are lightly toasted, about 1 hour. Cool slightly. Serve croustade warm or at room temperature with vanilla ice cream, if desired.

Serves 8 – I halved the recipe above and made two small croustades (used Packham pears)

Friday, June 25, 2010

Baby spice and strawberry butter cakes

Baby spice and strawberry butter cakes / Bolinhos de especiarias com geléia de morango caseira

After making the strawberry crostata – with such great results – I started searching for the rhubarb recipes I’d been keeping forever in order to make them using strawberries.

It reminded me of when I watched “Heat” and then started looking for everything Michael Mann had done before. :)

Baby spice and strawberry butter cakes
adapted from Australian Gourmet Traveller

Cakes:
1 cup (226g/2 sticks) soft unsalted butter
¾ cup golden syrup
3 eggs
1 ½ cups + 1 ½ tablespoons (225g) all purpose flour
2 teaspoons baking powder
2 teaspoons ground ginger
2 teaspoons ground cinnamon
1 teaspoon ground cloves

Strawberry compote:
300g strawberries, hulled and thinly sliced
¼ cup (50g) caster sugar
1 tablespoon water

Start by making the strawberry compote: combine strawberries, sugar and water in a saucepan, and bring to the boil over high heat (give it a little stir just to dissolve the sugar). Reduce heat to low, cover and cook for 2 minutes or until softened, then cook, uncovered, for 8 minutes, mixing occasionally, or until liquid has reduced and strawberries are soft – while mixing, squash the berries down using a silicon spatula to release all their juices. Cool completely.

Preheat the oven to 180°C/350°F; butter nine 2/3-cup capacity mini loaf pans*.
Using an electric mixer, cream butter and golden syrup until pale, then add eggs, one at a time, beating well between each addition, until incorporated.
Sift over flour, baking powder and spices and beat in low speed to combine – batter will be thick.
Spoon into prepared pans and spoon 2 teaspoons strawberry compote down center.
Bake for 12-15 minutes or until just cooked. Allow to cool slightly, then turn out onto wire racks and cool.
Cakes will keep in an airtight container for up to 3 days.

* I halved the recipe above, used 1/3 cup (80ml) muffin pans and got 8 cakes

Makes 9

Wednesday, June 23, 2010

Best cocoa brownies

Best cocoa brownies / Brownies de cacau

I’ve lost track of how many times I’ve made this recipe – my 16 year old sister loves these brownies and was surprised by how easy to put together they are the first time she saw me making them. It was a hit with my brother and at work, too. I left a comment on Chuck’s post on June, 2008 – that was the first time I baked these.
So why on earth did I wait so long to post such a great recipe? Because every time I made these brownies they disappeared so fast I could never get them photographed. :)

Best cocoa brownies

10 tablespoons (140g/1 ¼ sticks) unsalted butter
1 ¼ (250g) cups sugar - I used vanilla sugar
¾ cup + 2 tablespoons (80g) unsweetened cocoa powder (natural or Dutch-process)
¼ teaspoon salt
½ teaspoon pure vanilla extract
2 cold large eggs
½ cup (70g) all-purpose flour
2/3 cup (74g) walnut or pecan pieces (optional)

Position a rack in the lower third of the oven and preheat the oven to 160°C/325°F. Line the bottom and sides of a 20cm (8in) square baking pan with foil, leaving an overhang on two opposite sides. Butter the foil.

In a medium heatproof bowl, add the butter and set on top of a large sauce pan with barely simmering water. Melt the butter, then add sugar and salt, and stir until well combined. Next add the cocoa powder and stir until mixture is smooth and hot enough that you want to remove your finger fairly quickly after dipping it in to test. Remove the bowl from the skillet and set aside briefly until the mixture is only warm, not hot.
Stir in the vanilla with a wooden spoon. Add the eggs one at a time, stirring vigorously after each one. When the batter looks thick, shiny, and well blended, add the flour and stir until you cannot see it any longer, then beat vigorously for 40 strokes with the wooden spoon or a rubber spatula. Stir in the nuts, if using. Spread evenly in the lined pan.
Bake until a toothpick plunged into the center emerges slightly moist with batter, 20 to 25 minutes. Let cool completely on a rack.
Lift up the ends of the parchment or foil liner, and transfer the brownies to a cutting board. Cut into 16 or 25 squares.

Chuck’s note on chocolate: any unsweetened natural or Dutch-process cocoa powder works well here. Natural cocoa produces brownies with more flavor complexity and lots of tart, fruity notes, which maybe more exciting for you. Dutch-process cocoa results in a darker brownie with a mellower, old-fashioned chocolate pudding flavor, pleasantly reminiscent of childhood.

Makes 16 large or 25 smaller brownies

Monday, June 21, 2010

Lemon cream éclairs

Lemon cream éclairs / Éclairs de limão siciliano

Do you remember my complaining about the eggy smell on my profiteroles? As I wrote on that post, I tried adding vanilla extract to choux pastry and I think it worked well!

Since I’d already made profiteroles, I used the pastry to make éclairs this time – and you can blame the lemon filling on me. ;)

Lemon cream éclairs / Éclairs de limão siciliano

Lemon cream éclairs
from Australian Gourmet Traveller

Choux pastry:
½ cup (120ml) water
3 ½ tablespoons (50g) unsalted butter
½ cup + ½ tablespoon (75g) all purpose flour
3 eggs
1 teaspoon vanilla extract

Filling:
½ cup (120ml) whipping cream, chilled
½ cup lemon curd*
icing sugar, for dusting

Preheat the oven to 200°C/400°F; line two large baking sheets with baking paper.
Place the water and butter in a medium saucepan over high heat and cook until butter is melted and the mixture is boiling. Add the flour and beat with a wooden spoon until smooth. Cook, stirring over low heat, until the mixture leaves the sides of the pan. Remove from heat and place in an electric mixer. Gradually add the eggs, beating well between each addition, until well combined – you might not need to add all the third egg - lightly beat the last egg and add it gradually to the mixture. Add the vanilla and mix well.
Spoon the mixture into a piping bag with a 1cm plain nozzle. Pipe 5cm (2in) lengths onto prepared baking sheets. Bake for 20-25 minutes or until puffed and deep golden. Cool on wire racks. Carefully peel off each éclair from the baking paper.
Place cream in a medium bowl and whip until firm peaks form. Gently fold in the lemon curd. Transfer the mixture to a piping bag with a small nozzle.
Cut the éclairs in half horizontally and fill with the lemon cream. Dust with icing sugar to serve.

* 1/3 of the lemon curd recipe on this post yields ½ cup – the only thing I did differently was adding finely grated lemon zest after passing the curd through a sieve

Makes about 40

Saturday, June 19, 2010

Kitchen garden soup with tiny herb omelettes

Kitchen garden soup with tiny herb omelettes / Sopa do jardim com mini omeletes de ervas

It’s almost winter here and I have to say I love cold days – maybe because they remind me of the time I spent with my mom as a kid, watching cartoons under the blanket after school with a bowl of her piping hot rice pudding, loaded with cinnamon...

Now that I’m a grown-up I have to do boring things – like going to work – but I still have a nice feeling when the cold wind hits my face. For days – and nights – like these, soups are my favorite kind of meal. I must confess, though, that I only made this recipe because of the tiny omelettes – aren’t they cute? :)

Kitchen garden soup with tiny herb omelettes / Sopa do jardim com mini omeletes de ervas

Kitchen garden soup with tiny herb omelettes
adapted from The Cook's Companion

1 onion, diced
2 carrots, peeled and diced
2 potatoes, peeled and diced
1 bay leaf
1 large sprig thyme
100g unsalted butter
2 liters chicken stock
300g snow peas, washed and strung
salt and freshly ground black pepper

Herb omelettes:
2 eggs
2 tablespoons breadcrumbs
1 tablespoon freshly chopped parsley
1 teaspoon freshly snipped chives
salt and freshly ground black pepper
Olive oil, for frying

Sweat onion, carrots, potatoes and herbs in butter in a large saucepan for 10 minutes. Add stock and bring to a boil. Reduce the heat, cover and simmer for 10 minutes or until potatoes and carrots are tender. Drop in snap peas and boil vigorously for 3 minutes. Remove the bay leaf and the thyme sprig, blend at once in a food processor, then strain through a coarse sieve and season with salt and pepper – I blended the soup but did not strain it. Keep warm.

Make the omelettes: place the eggs in a bowl, beat with a fork, then add the breadcrumbs, parsley, chives, salt and pepper. Heat a little olive oil in a non-stick frying pan over high heat and fry teaspoonfuls of egg mixture until crisp and a little puffed at the edges. Turn and cook until golden on the other side as well. Remove from the pan and keep warm.
Serve the soup with the omelettes as garnishes.

Serves 4

Thursday, June 17, 2010

Strawberry crostata

Strawberry crostata / Crostata de morango

As a kid my favorite dessert was strawberry tart – it was similar to the banana tart I made for my dad a while ago: same crust and filling, with the strawberries beautifully arranged on top of the velvety cream – mom brushed the berries with jam so they’d be shiny and pretty. :)

My taste buds have changed a lot all these years and my childhood tart is no longer my favorite dessert, but I’m still crazy about strawberries; I used them instead of rhubarb and raspberries in this recipe and have to say that NOT eating all the filling before making the crostata was one of the toughest things I’ve ever done in my kitchen. :)

Strawberry crostata / Crostata de morango

Strawberry crostata
adapted from Australian Gourmet Traveller

600g strawberries, hulled and halved
1 ¼ cups (250g) caster sugar
1 10cm-piece of orange zest
juice of 1 orange
1 5cm-piece of lime zest
juice of ½ lime
2 teaspoons finely grated fresh ginger
scraped seeds of 1 vanilla bean
1 egg beaten with ½ tablespoon water, for brushing (egg wash)
2 tablespoons demerara sugar, for dusting

Pasta frolla:
1 ½ cups + 1 tablespoon (220g) all purpose flour
¼ cup + 3 tablespoons (100g) cold unsalted butter, coarsely chopped
60g pure icing sugar, sifted
scraped seeds of 1 vanilla bean
pinch of salt
1 egg plus 1 egg yolk, lightly beaten

For pasta frolla, process flour, butter, icing sugar, vanilla seeds and salt in a food processor until fine crumbs form. Gradually add egg mixture, process until mixture just comes together – you might not need all the egg mixture. Turn onto a lightly floured surface, knead lightly until smooth. Wrap in plastic wrap, refrigerate to rest (1-2 hours).

Meanwhile, combine strawberries in a large saucepan with caster sugar, zests, juices, ginger and vanilla seeds. Stir over medium-high heat until sugar dissolves, then bring to the boil and stir occasionally until very thick and jammy (10-15 minutes) – while mixing, squash the berries down using a silicon spatula to release all their juices. Set aside to cool completely, the remove the orange/lime zest pieces.

Preheat oven to 180°C/350°F. Roll out two-thirds of the pasta frolla on a lightly floured surface into a 3mm-thick rectangle and line a buttered 13cm x 36cm rectangular tart pan, trim edges and spoon in cooled strawberry mixture. Roll out remaining pasta frolla on a lightly floured surface to 3mm thick, then cut into 15mm-wide strips. Arrange strips in a lattice over jam, press pastry edges to seal and trim excess. Brush pastry with egg wash, dust with demerara sugar and bake until pastry is crisp and golden (40-45 minutes).
Cool in pan before serving.
Crostata is best eaten on day of making.

Serves 10 – I made ¾ of the recipe above and used a 30x10cm pan; there was some pasta frolla left, and I froze it.

Tuesday, June 15, 2010

Pao de mel macarons

Pao de mel macarons / Macarons de pão de mel

I think the macaron bug has bitten me. :)

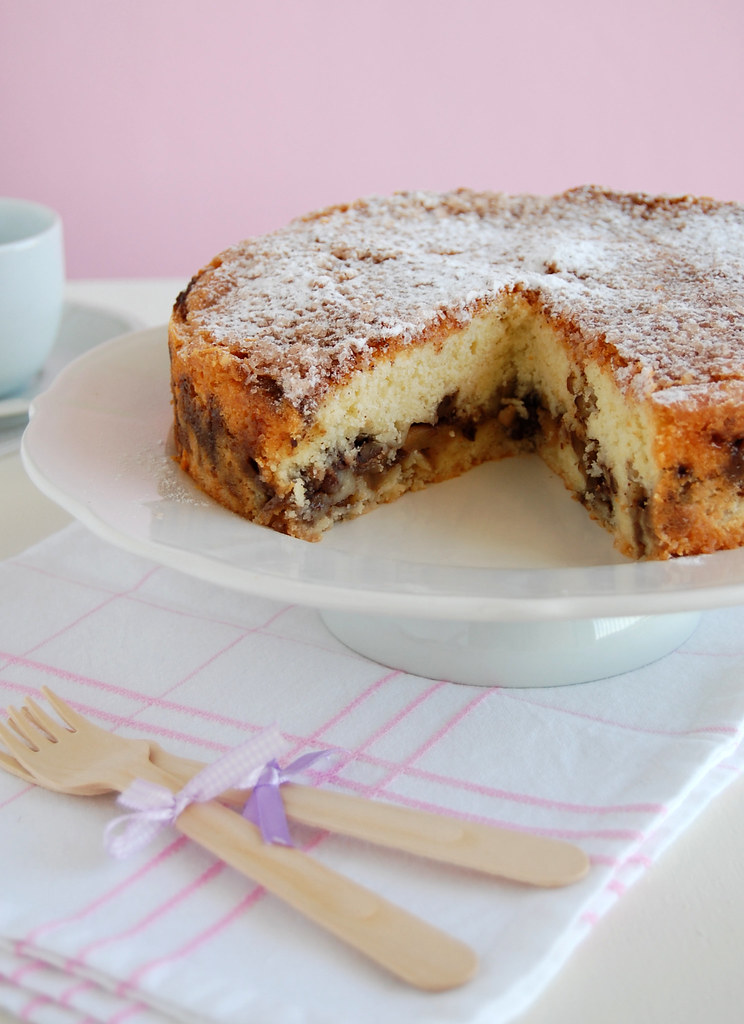
After my passion fruit-scented victory, I desperately felt like making macarons again; inspired by my lovely macaron muses – Julia, Aran, Meeta, Evan, and Your Highness, the Queen – I tried to come up with a different flavor, so I used spices, cocoa and dulce de leche and tried to evoke the flavors of pao de mel, which is something everyone loves here in Brazil.

Well, I guess I’ll have to stock up on almond meal... :)
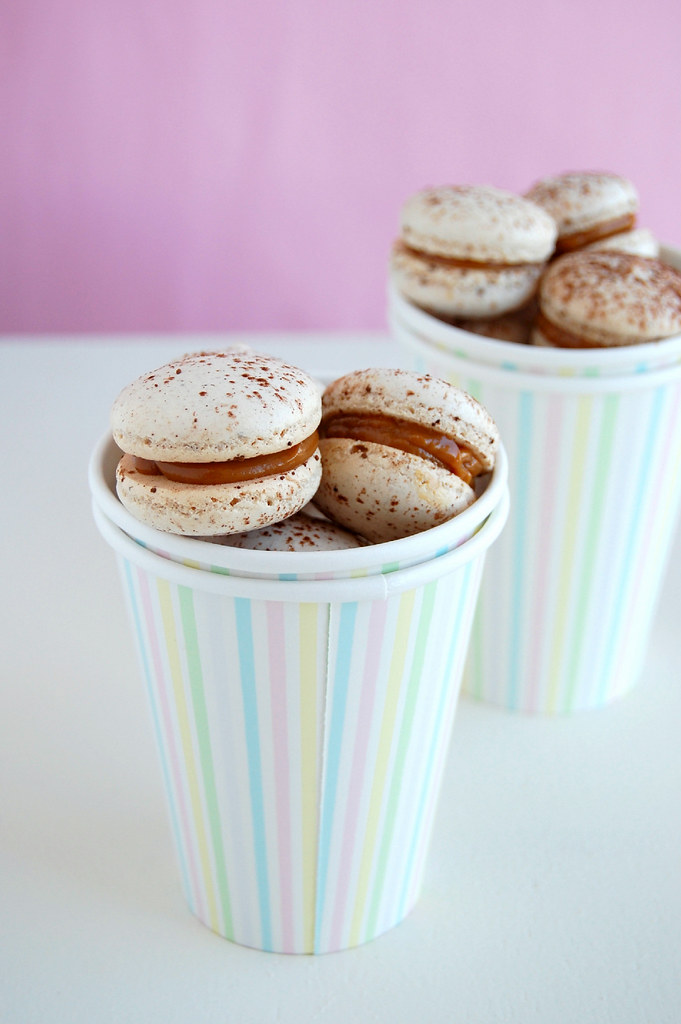
Pao de mel macarons
adapted from here

Shells:
150g almond meal
150g confectioners’ sugar
120g egg whites (room temperature)
185g granulated sugar
50g water
1 teaspoon ground cinnamon
½ teaspoon ground ginger
¼ teaspoon ground cloves
about ½ tablespoon cocoa powder, for sprinkling

Filling:
½ cup firm dulce de leche

You will need 2-3 baking sheets for these , depending on how closely you pipe them; make sure you use good quality aluminum pans – if they’re too thin, the macarons might crack on top. I followed Ms. Humble’s tip and double layered the pans. I also used baking paper, this baking mat and this one and got the best results with the teflon one.

Prep a large pastry bag with a #11 Ateco tip (or a similar medium sized round tip, little under 1cm) – I did not use a tip, I just cut the tip of the pastry bag. Pre-heat your oven to 160-162°C (320-325°F) – I wouldn’t recommend making macarons with an oven thermometer.

You will need a candy thermometer for this method, as it will require bringing the sugar syrup to a precise temperature. Half of the whites I used had been in the fridge for 4 days (and had been previously frozen for 2 weeks) and half was from fresh eggs.

Weigh out your confectioners’ sugar and almond meal and give them a whirl for a minute, pulsing in a food processor. Pour the almond/sugar mixture into a large bowl, mix in the cinnamon, ginger and cloves and set aside.

Weigh out 60g of egg whites into the bowl of your stand mixer (make sure the whites are yolk free and your mixer's bowl and whisk attachment are very clean and free of any traces of oil). Also measure out 35g of granulated sugar into a small bowl and set it near the mixer.
Weigh out another 60g of egg whites into a small bowl and set aside.

Weigh out 150g of the granulated sugar into a small sauce pan. Add 50g of water to the sugar, attach your candy thermometer and place it over medium heat – use a very small saucepan so its tip will be immersed in the syrup.
When the sugar hits 87°C/190°F, start beating the egg whites in your mixer on medium low speed until foamy, while keeping a close eye on the sugar syrup. No need to stir the syrup, just let it come to a boil over medium heat (you're aiming for 110°C/230°F). Once the eggs are foamy, slowly add the 35g of sugar and beat to soft peaks on medium speed.

When your sugar mixture hits 110°C/230°F pull it off the heat, increase the speed of your mixer to medium high, and slowly pour in the syrup. You want to let the mixture trickle down the side of the bowl, so it doesn't splatter and get tossed onto the sides of the bowl. You want the sugar in your meringue, not a candy coated bowl.

Now you can relax, the hard part is over. Allow the mixer to beat the meringue for about 5-8 minutes until cool.

While waiting for your meringue to cool, combine the remaining 60g of egg whites with the sugar/almond mixture and mix until well combined.

Once the meringue is ready, add it to the almond/sugar mixture and quickly fold it together. You should fold until it is just barely uniform, using as few strokes as possible. It is very, very important you don't over mix as the batter will thin considerably with each stroke of the spatula. Your batter is perfect when you lift your spatula and a thick ribbon slowly cascades off, back into the bowl.
Now you're ready to fill your piping bag. If the mixture is just right, it will ooze from the tip slowly under its own weight. (If it oozes out quickly, something went horribly wrong and you'll need to start over.)

Pipe 3cm macarons onto your prepared baking sheets, spacing them a few centimeters apart.

Once you complete a full pan, knock it on the counter gently, to bring up any bubbles and quickly pop them with toothpick (I forgot to do that). Using a small sieve, sprinkle the cocoa powder over the macarons (just a little).

Allow the macarons to rest like this for 15 minutes. (They can sit longer if you want to bake one or two sheets at a time, but will develop slightly thicker shells)

Bake at 160-162°C/320-325°F for 14 minutes (I baked mine for 17).

Once done, remove from the pans using the silicone baking mat and allow to cool completely (about an hour) before carefully attempting to remove them from the mat. If you're having trouble even after an hour, pop the sheet into the freezer for about 5 minutes and they should pop off easily.

Fill a piping bag with the dulce de leche and use to sandwich your macarons.
To store, keep the shells in an air tight container. Fill before serving.

Makes about 50 macarons (already filled)

Sunday, June 13, 2010

Asparagus and ricotta tarts

Asparagus and ricotta tarts / Tortinhas de ricota e aspargo

Joao bought a bunch of asparagus a while ago and, for some reason I can’t remember now we did not eat them right away – I ended up freezing the asparagus but wasn’t sure if that would work.

I decided to make tartlets to check if the asparagus were still good and they turned out delicious – I place the asparagus still frozen on top of the ricotta filling and baked according to the recipe.

No asparagus around? Don’t fret – I think these tartlets would be great with other veggies, such as broccolini and zucchini.

Asparagus and ricotta tarts
adapted from Donna Hay magazine

1 sheet ready-prepared butter puff pastry, thawed
¾ cup (150g) fresh ricotta
1 cup finely grated parmesan
¼ cup parsley leaves, chopped
finely grated zest of 1 lemon
1 teaspoon olive oil – I used garlic infused
salt and freshly ground black pepper
12 asparagus spears, trimmed
olive oil extra, for brushing

Preheat the oven to 200°C/390°F. Line a large baking sheet with foil.
Cut out four 12x6cm rectangles from the pastry sheet and place on the prepared sheet. Score a 1cm border on each rectangle.
Place the ricotta, parmesan, lemon zest, parsley, salt and pepper in a bowl and stir to combine. Spoon the ricotta mixture onto the pastry and top with the asparagus. Brush the pastry borders with the oil. Bake for 12–15 minutes or until the pastry is puffed and golden. Serve immediately.

Serves 4.

Friday, June 11, 2010

Milk chocolate-filled cinnamon doughnuts

Milk chocolate-filled cinnamon doughnuts / Doughnuts com canela recheados com chocolate ao leite

Still on the feasible side of promises and resolutions, I’ve been trying to make more yeasted recipes – because I always tell people I love working with yeast but taking a look at my blog that doesn’t sound very true.

I got this recipe here – the same magazine these buns came from – and highly recommend it: the doughnuts are tender, taste great and imho don’t necessarily need the chocolate filling.
Just need to warn you the recipe yields a lot – not a bad thing if you have a big family, but that is not my case. :)

Milk chocolate-filled cinnamon doughnuts
from Australian Gourmet Traveller

2 ¼ teaspoons (7g) dried yeast
1 cup buttermilk, at room temperature
¼ cup + ½ tablespoon (56g) caster sugar
5 cups + 1 tablespoon (710g) all purpose flour
¼ cup + 3 tablespoons (98g) unsalted butter, melted
3 eggs
pinch of salt
100g milk chocolate, coarsely chopped
milk, for brushing
vegetable oil, for frying
cinnamon sugar, for dusting

Combine yeast, buttermilk, sugar and ¼ cup (60ml) warm water in the bowl of an electric mixer and stand for 10 minutes or until foamy. Add flour, butter, eggs and a pinch of salt and mix using dough hook attachment. Turn onto a floured surface and knead until smooth – I used the mixer for the whole process. Form the dough into a ball and place in a lightly oiled bowl, turning to coat, cover with plastic wrap and stand for 1 hour or until doubled in size.
Turn dough onto a lightly floured surface and roll to 3mm thick. Using a 7.5cm (3in) round cutter dipped in flour, cut out rounds, re-roll dough and repeat. Divide milk chocolate among half the rounds, placing in center, brush edges with milk and top with remaining rounds. Using a 6.5cm (2 ½in) round cutter dipped in flour, trim rounds, pressing to seal. Place 2.5cm (1in) apart on a lightly floured tray and stand for 30 minutes or until doubled in size.
Heat oil in a large deep saucepan or deep-fryer to 160°C/320°F. Deep-fry doughnuts, in batches, turning occasionally for 2-3 minutes, or until puffed and golden. Place over paper towels to absorb excess oil.
Roll in cinnamon sugar and serve immediately.

Serves 15 – I halved the recipe above and got 22 doughnuts

Wednesday, June 9, 2010

Strawberry crumble

Strawberry crumble / Crumble de morango

This cold weather makes me crave hearty, comforting food, both savory and sweet. On the savory side soups get all my attention, but when it comes to sweet recipes crumbles are THE winter dessert to me – I could easily have one a day. :)

This delicious crumble comes from Valentina’s fabulous blog – and just so you know it, I’m just getting started on strawberry recipes around here. :)

Strawberry crumble

185g strawberries, hulled and halved lengthwise
1 tablespoon caster sugar
½ tablespoon lemon juice – I used lime
3 ½ tablespoons (49g) cold unsalted butter, chopped
½ cup + 1 tablespoon (80g) all purpose flour
3 ½ tablespoons (42g) caster sugar
pinch of salt

Preheat the oven to 180°C/350°F.
Butter two 1-cup capacity ovenproof bowls and divide the strawberries among them. Sprinkle each with ½ tablespoon sugar and drizzle with the lemon juice.
Place the butter, flour, sugar and salt in a small bowl and, using your fingertips, rub them together until mixture resembles breadcrumbs. Sprinkle over the strawberries, place the bowls on a baking sheet and bake for 25-30 minutes or until golden.
Serve warm with cream or yogurt.

Serves 2

Monday, June 7, 2010

Apple pecan coffee cake with cinnamon sugar topping

Apple pecan coffee cake with cinnamon sugar topping / Bolo de maçã e pecã com cobertura de açúcar e canela

I’ve come to a conclusion: one can’t bake too many apple cakes – especially now that they’re in season here in Brazil and the prices are really good. :)

Don’t be scared by the three different steps in this recipe: they’re all simple and I’m sure you’ll love the result – the crunchy pecans go beautifully well with the soft apple bits. Yum!

Apple pecan coffee cake with cinnamon sugar topping
slightly adapted from The All-American Dessert Book

Pecans:
1 cup (110g) pecans, coarsely chopped
2 ½ tablespoons packed light brown sugar
1 tablespoon corn syrup
1 tablespoon unsalted butter, slightly softened

Cake:
3 ½ cups peeled, cored and diced (1/3in) flavorful apples – I used Gala
1/3 cup (58g) packed light brown sugar
½ teaspoon ground cinnamon
3 cups (420g) all purpose flour
1 ¼ teaspoons baking powder
generous ½ teaspoon salt
1 cup (2 sticks/226g) unsalted butter, slightly softened
2 cups (400g) granulated sugar
3 large eggs
2/3 cup (174g) plain yogurt
2 ½ teaspoons vanilla extract

Topping:
3 tablespoons granulated sugar
½ teaspoon ground cinnamon

Position a rack in the middle of the oven and preheat the oven to 180°C/350°F. Butter a 22x32cm (9x13in) baking pan*.
Line a rimmed baking sheet with foil.
In a medium bowl, stir together the pecans, brown sugar, corn syrup and butter until the pecans are coated. Spread the pecan mixture on the foil liked sheet and toast, stirring occasionally, for 9 to 14 minutes or until nicely browned. Let cool completely then chop into ¼ in bits – the pecans will keep, stored airtight, at room temperature for several days.
In a large bowl thoroughly stir together the apples, brown sugar and cinnamon. Sift together the flour, baking powder and salt into a small bowl and set aside.
In a large bowl with a mixer on medium speed, beat the butter and granulated sugar until lightened and fluffy, about 2 minutes, scraping down the sides of the bowl as needed. Add the eggs, one at a time, and beat until well blended, about 2 minutes. On low speed, beat in half the dry ingredients just until thoroughly incorporated, scraping down the sides of the bowl as needed. Add the yogurt and vanilla, beating just until evenly incorporated. Beating on low, add the remaining dry ingredients, then beat in medium speed until evenly blended – batter will be stiff.
Spoon half the batter into the pan, spreading it evenly to the edges with a buttered palette knife, the layer will be thin. Using a slotted spoon and shaking off any excess juice, distribute the apple mixture over the batter. Sprinkle with the pecans then spoon the remaining batter over the apples and pecans, spreading it to the edges – the batter will seem skimpy. Mix the topping ingredients in a small bowl and sprinkle over the cake.
Bake for 45-55 minutes or until the top is well browned and a toothpick inserted in the center of the cake comes out clean. Transfer the pan to a wire rack and let cool completely – I dusted the cake with a little icing sugar to make it look nicer. :)

The cake will keep, stored airtight in a cool place, for up to 2 days, or refrigerated for 2-3 days or longer – let it come to room temperature before serving.

* I halved the recipe above and used a 20cm (8in) round cake pan, with a removable bottom; I lined the bottom of the pan with baking paper and buttered the paper as well to make unmolding easier

Serves 12

Friday, June 4, 2010

Spicy lentil and chorizo soup and inexplicable cravings

Spicy lentil and chorizo soup / Sopa apimentada de lentilha com lingüiça

I’ve told you lots of times already about how blogging has changed my life in several different ways and that I no longer suffer from “The Hairy Ape” syndrome... But after all these years of blogging one thing is completely new to me: after 16 years without red meat – because I never liked it and was forced to eat it as a kid – lately I’ve been drooling over some red meat recipes... How crazy is that? I blame it on Nigella and her black and blue beef wraps... :)

I’m so out of my mind that I HAD to make this soup as soon as I saw it – I wonder if there is a solution to my case... :)

Spicy lentil and chorizo soup
from Donna Hay magazine

2 tablespoons olive oil
1 onion, finely chopped
2 cloves garlic, crushed
2 x 150g chorizo sausages, sliced
½ teaspoon dried chilli flakes
1 cup (210g) lentils
2 x 400g cans chopped tomatoes*
1 liter chicken stock
salt and freshly ground black pepper
crusty bread, to serve

Heat a large saucepan over medium heat. Add the oil, onion, garlic, chorizo and chilli flakes and cook for 8–10 minutes or until the onion is tender and the chorizo is golden. Add the lentils, tomato, stock, salt and pepper, bring to the boil and cook for 15 minutes or until the lentils are tender. Serve with crusty bread.

* I had some leftover tomato sauce and used it instead (I did not add any salt to the soup)

Serves 4.

Wednesday, June 2, 2010

Nutella panna cotta

Nutella panna cotta / Panna cotta de Nutella

I had lunch with a friend the other day and she ordered Nutella cheesecake for dessert – “I’ve never had Nutella cheesecake in my life, but it must be good – anything with Nutella is good”, she said.

Well, I have to agree with Luciane, anything with Nutella is good, indeed – including panna cotta. :)

Nutella panna cotta
slightly adapted from The Craft of Baking

1 tablespoon powdered gelatin
1 cup Nutella
¼ teaspoon salt
1 ½ cups (360ml) heavy cream
½ teaspoon vanilla extract
1 cup (240ml) whole milk

In a medium bowl, whisk together the gelatin and 3 tablespoons cold water.
Put the Nutella and salt in a medium bowl and set aside.
In a medium saucepan, bring the cream and vanilla to a boil. Pour 1/3 of the hot cream mixture over the gelatin and whisk it well. Then pour the gelatin mixture back into the remaining cream.
Pour about 1/3 of the cream mixture over the Nutella. Whisk well to form a smooth paste. Add the remaining cream mixture and whisk well to combine. Whisk in the milk.
Strain the mixture through a fine sieve into a bowl, then divide it among eight ramekins, glasses or cups. Refrigerate until set, about 3 hours – the panna cotta can be kept, loosely covered with plastic wrap, in the refrigerator for up to 2 days.
They can be served in the ramekins or dipped in hot water and unmolded onto a serving plate.

Serves 8

Related Posts with Thumbnails